
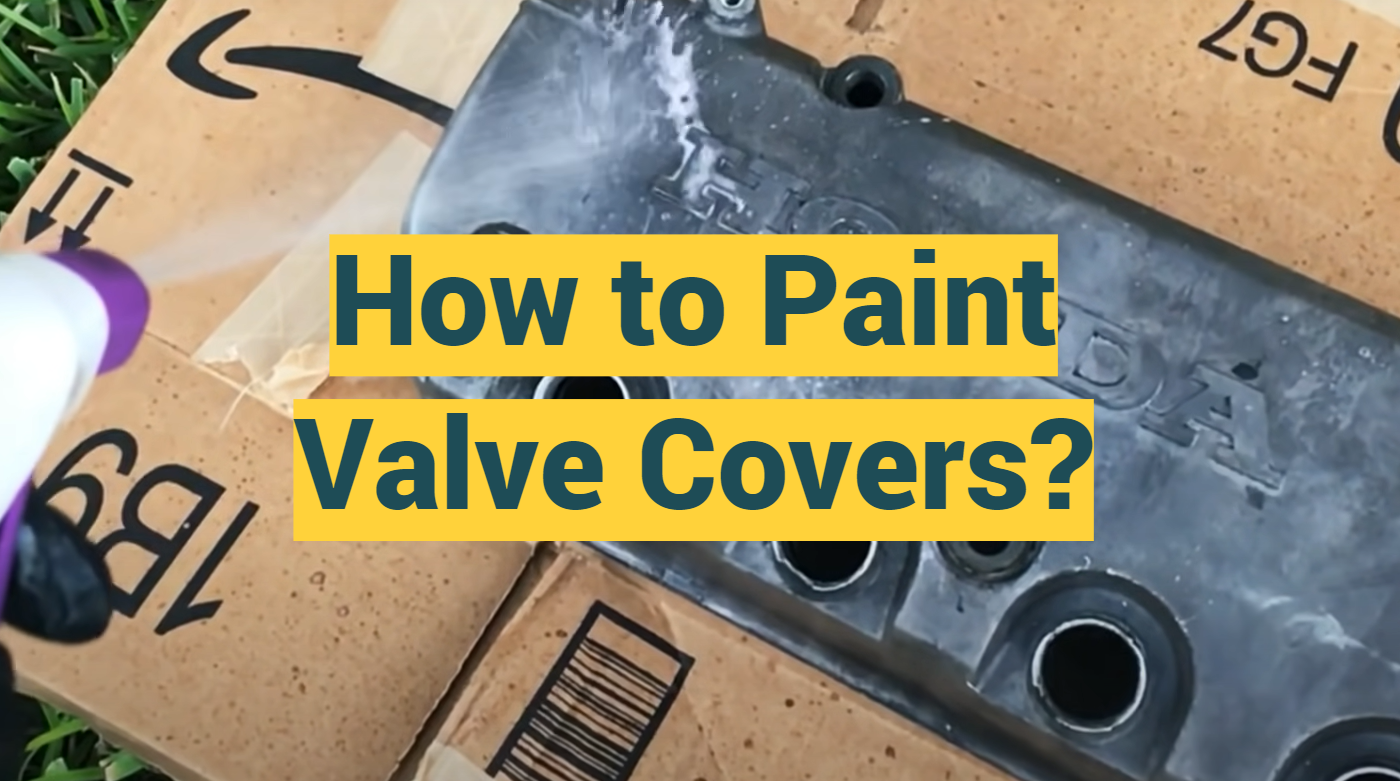
Valve covers are an important part of your engine. Not only do they help to keep the engine looking good, but they also protect the valves. If you’re not happy with the way your valve covers look, or if they’re starting to show signs of wear and tear, it’s time to paint them. In this article, we will discuss how to paint valve covers in a step-by-step manner. We’ll answer some common questions and provide some useful tips that will make the process easier for you. Let’s get started!
How to Paint Valve Covers?
You’ll need:
- Valve covers
- Sandpaper (600 grit)
- Primer
- Paint
- Clear coat
Instructions
Before you start painting, it’s important to sand the valve covers.
Once the valve covers are sanded, you can apply a primer. After the primer is dry, you can start painting your valve covers. Be sure to use several thin coats of paint rather than one thick coat.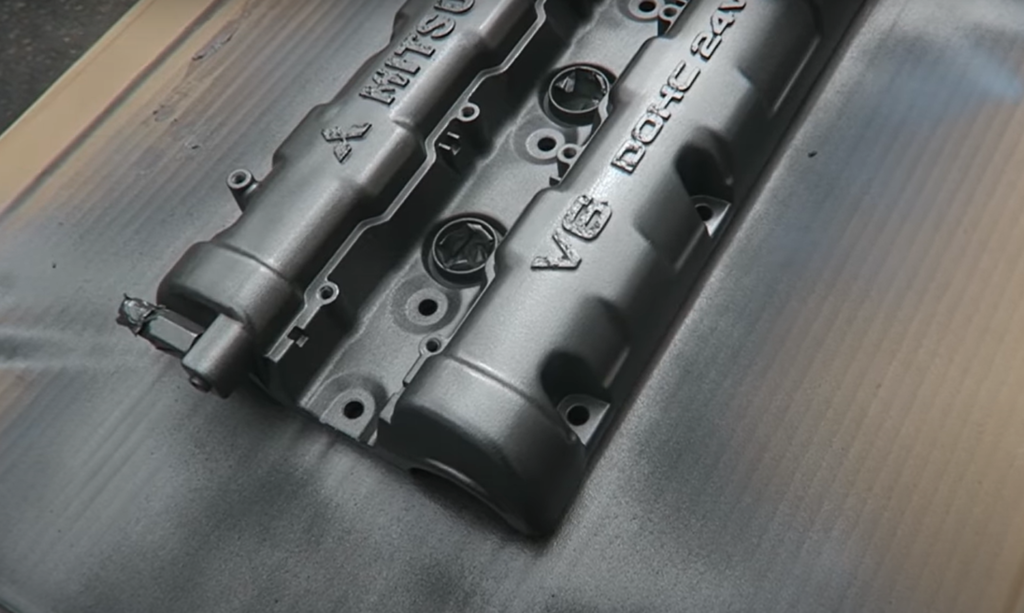
This will help prevent runs and drips in your paint job. Finally, once the paint is dry, you can apply a clear coat for added protection. [1]
What paint can you use on a valve cover?
Spray paint is the most common type of paint used on valve covers. However, there are a few other types of paint that can be used. These include:
- Aerosol spray paint
- Brush-on enamel
- Roll-on enamel
Aerosol spray paint is the easiest type of paint to use and will give you the best results. Brush-on enamel is also easy to use but can be difficult to get an even coat. Roll-on enamel is the most difficult to use but will give you the best results. [2]
Can you paint a valve cover?
Yes, you can paint a valve cover. You’ll need to sand it down first to get the paint to stick, and then you can use any kind of paint you like. Just make sure that you let the paint dry completely before putting the cover back on the engine.
Can you use normal spray paint on the engine?
No, you should not use regular spray paint on your engine.
Some people recommend using a powder coating instead of paint. Powder coating is more durable and will not peel or chip under high temperatures. However, it is also more expensive. If you decide to powder coat your valve covers, be sure to follow the instructions carefully.
Do you have to use high temp paint on valve covers?
No, you don’t have to use high temp paint on valve covers. You can use any type of paint that you want. However, if you are going to use high temp paint, make sure that you follow the directions on the can carefully.
Can you paint a valve cover without removing it?
It’s possible to paint a valve cover without removing it, but it’s not recommended. It’s much easier to remove the valve cover and lay it flat on a surface so you can evenly apply the paint. Plus, if there are any nooks or crannies that need painting, it’s much easier to do when the valve cover is removed.
If you decide to paint the valve cover while it’s still on the engine, be sure to tape off any areas that shouldn’t be painted, like electrical connections. And use a small brush or Q-tip for hard-to-reach spots.
Once you’re finished painting, let the valve cover dry completely before putting it back on the engine. Otherwise, you run the risk of getting paint everywhere!
Can you paint plastic valve covers?
The answer is yes, you can paint plastic valve covers. However, there are a few things to keep in mind when painting plastic valve covers. First of all, make sure that the plastic valve cover is clean and free of any dirt or debris. You can use a mild soap and water solution to clean the valve cover. Once the valve cover is clean, you will need to sand it down with fine-grit sandpaper. This will help to create a smooth surface for the paint to adhere to. After sanding, wipe down the valve cover with a damp cloth to remove any dust particles. [3]
Now that your valve cover is prepped and ready, you can start painting! When choosing a paint for your project, it is important to select a paint that is specifically designed for plastic surfaces. These paints will have a lower level of adhesion and are less likely to crack or peel over time. Once you have your paint, apply a thin layer evenly across the surface of the valve cover. Allow the first coat of paint to dry completely before applying a second coat. After the final coat of paint has dried, you can reattach your valve cover and enjoy your new paint job!
This will help to extend the life of your project and keep your valve cover looking like new for longer!Does a valve cover need heat-resistant paint?
If you’re looking to get the best results possible, then yes – heat-resistant paint is essential. Not only will it stand up to the high temperatures that your engine produces, but it will also provide a much more durable and long-lasting finish.

There are several brands of heat-resistant paint on the market, so doing some research and finding one that suits your needs should be easy enough. Once you’ve got your hands on some quality heat-resistant paint, simply follow the instructions on the tin and you’ll be good to go!
With these simple tips, you should have no trouble getting a great finish that will last for years to come.
Tips on How to Paint Valve Covers
If you’re looking for a way to add a little personal touch to your engine, or just want to freshen up the look of your car, then painting your valve covers is a great option. And, it’s not as difficult as you might think!
Before you start painting, it’s important to clean the surface. You don’t want any dirt or grime to interfere with the paint job. Once the surface is clean, you can begin prepping for painting.
If you’re using an aerosol paint sprayer, then you’ll need to thin the paint slightly so that it will work properly in the sprayer. You can do this by adding a little bit of water to the paint. Once the paint is thinned, you’re ready to start painting.
And, be sure to let each coat fully dry before adding another.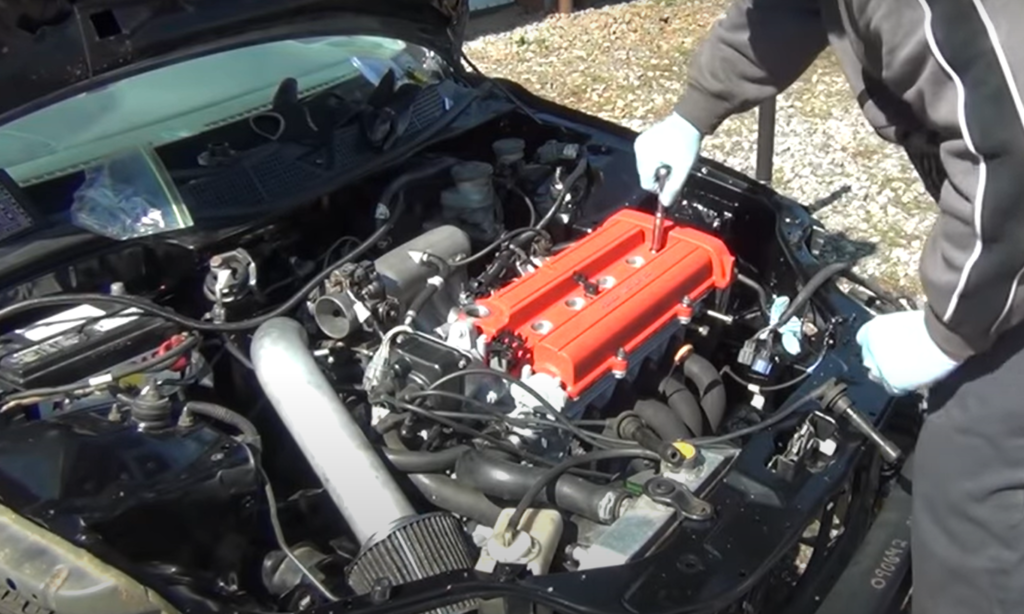
Once you’ve got the desired coverage with your paint job, you’ll need to let it cure for 24 hours before putting the valve cover back on your engine. After that, enjoy your new-looking engine! Painting valve covers is a great way to add a personal touch to your car, and it’s not as difficult as you might think.
FAQ
What paint should I use to paint my valve cover?
The best paint to use is a high-temperature engine paint. This type can withstand the high temperatures that are produced by engines, and it will also resist corrosion and fading.
Another option is to use an automotive primer followed by a topcoat of automotive paint. This method will provide a durable finish that will last for many years.
If you are looking for a temporary solution, then spray paint can be used. However, this option will not last as long as the other two options mentioned above. [4]
Whatever type of paint you decide to use, ensure to follow the instructions on the label carefully in order to achieve the best results possible.
What are some tips for painting my valve cover?
Here are a few tips to help you get the best results:
- Clean the surface of the valve cover thoroughly before beginning. This will remove any dirt, grease, or other debris that could prevent the paint from adhering properly.
- Use painters tape to mask off any areas that you do not want to paint for creating clean lines and prevent accidental paint drips.
- If possible, remove the valve cover from the engine before painting. This will make it easier to paint evenly and prevent any paint from getting inside of the engine.
- Apply several thin coats of paint rather than one thick coat. This will allow the paint to dry evenly and prevent runs or sagging.
- Allow the paint to fully dry before reinstalling the valve cover. This will ensure that the paint is fully cured and will not be damaged by heat or engine vibration.
How do you paint a plastic valve cover?
You don’t necessarily need to use primer, but if your valve cover is very old or the paint is in poor condition, the primer will help the paint to adhere better. If you’re using spray paint, apply several light coats rather than one heavy coat. Allow each coat to fully dry before applying the next. Once the final coat is dry, you can reinstall the valve cover.
If you’re painting a metal valve cover, it’s important to sand it down before painting. You’ll also want to use a primer before painting. Apply several light coats of paint.
How do you prepare aluminum valve covers for paint?
Before painting aluminum valve covers, it’s important to properly clean and prep the surface. This will ensure that the paint adheres well and looks its best. To clean the valve covers, first, remove any dirt or grime with a degreaser. Then, sand the surface with fine-grit sandpaper to create a smooth base for the paint to adhere to. Once the surfaces are prepped, you’re ready to begin painting!
Use a high-quality primer designed for use on metal surfaces. Apply a thin layer of primer and allow it to fully dry before moving on to the next step. Once the primer is dry, you can begin applying your chosen paint color. For best results, use several thin coats. Allow the paint to dry completely between each coat. [5]
Once you’ve applied the desired number of paint coats, allow the valve covers to fully dry before reinstalling them on your engine.
How do you paint a Chevy valve cover?
To paint your Chevy valve cover, you’ll need to remove it from the engine first. Once it’s off, clean it with a degreaser and sand down any rough spots. Next, apply a primer and let it dry. Once the primer is dry, you can start painting your valve cover with a high-quality automotive paint. Make sure to let each coat of paint fully dry before applying the next one. When you’re finished painting, let the valve cover dry for 24 h before reinstalling it on your engine. [6]
Useful Video: How to PROPERLY Spray Paint (Valve Covers and Engine Parts)
Conclusion
So there you have it, a detailed guide on how to paint valve covers. Painting your valve covers is a great way to add a personal touch to your car and make it look unique. If you follow these steps carefully, you should have no problem painting your own valve covers and giving them a professional-looking finish. Just be sure to take your time and be patient, and the results will speak for themselves. Thanks for reading!
References:
- https://jalopnik.com/heres-the-best-guide-on-how-to-paint-your-valve-cover-1825781135
- https://www.instructables.com/How-to-Paint-Your-Valve-Cover-1/
- https://www.focusfanatics.com/threads/how-to-paint-your-old-plastic-valve-cover-and-give-it-a-new-look.415090/
- https://www.wikihow.com/Paint-a-Valve-Cover
- https://artradarjournal.com/2022/02/14/how-to-clean-and-paint-aluminum-valve-covers/
- https://www.jalopyjournal.com/forum/threads/how-do-you-paint-valve-covers.1152915/