

When it comes to painting, selecting the right tools is crucial for achieving high-quality results. Two of the most commonly used tools in painting are the paint roller and the paintbrush. Each of these tools possesses unique strengths and weaknesses, and the optimal choice for your project may depend on several factors.
The paint roller, known for its efficiency and speed, is an excellent option for covering large surface areas quickly. Its large roller head allows for smooth and even application of paint, making it suitable for walls, ceilings, and other expansive areas. Additionally, the paint roller is relatively easy to use and requires minimal experience or skill.
On the other hand, the paintbrush offers more precision and control, making it ideal for detailed work and smaller areas. With its bristles, the paintbrush allows for intricate brushstrokes and precise application, ensuring accurate coverage and fine details. Although it may take more time and effort compared to the paint roller, the paintbrush provides a smooth and professional finish, especially on trim, corners, and other intricate parts.
When deciding between the paint roller and the paintbrush, consider factors such as the size of the project, the desired finish, and your level of experience. For larger areas and a faster application, the paint roller is a practical choice. However, if precision and fine details are paramount, the paintbrush is the way to go.
In conclusion, understanding the characteristics, applications, and limitations of both the paint roller and the paintbrush is essential in making an informed decision for your painting project. By selecting the right tool, you can achieve the desired results and elevate the quality of your work.
When to use a paint brush?
Paint brushes are an excellent choice for smaller, detailed tasks due to their precision. They shine in projects where you need to paint narrow spaces, intricate mouldings, or small furniture pieces with utmost accuracy and finesse. The delicate bristles of a brush allow you to navigate the contours and edges effortlessly, ensuring that every stroke is precise and controlled.

Not only do brushes offer great control when painting sharp, clean lines, such as when cutting in against a different colored wall or painting window frames, but they also excel in capturing the subtleties of texture and depth. With a brush in hand, you can effortlessly create subtle gradients and layered effects, adding dimension and nuance to your artwork or home improvement projects.
Moreover, brushes prove to be the perfect tool for projects involving oil-based paint or varnish. Unlike rollers, which tend to create bubbles and uneven surfaces in these materials, brushes glide smoothly and evenly, allowing for a flawless finish. The fine bristles of a brush evenly distribute the paint or varnish, ensuring a professional and polished outcome.
In essence, whenever precision and attention to detail are paramount, a paint brush tends to be the superior tool. Its ability to navigate tight spaces, capture intricate details, and deliver precise lines makes it an indispensable companion for any meticulous project or artistic endeavor. So, whether you’re a professional painter or a passionate DIY enthusiast, embrace the versatility and finesse that a paint brush brings to your creative journey.[1]
Types of paint brushes
Angle cut brush
An angle cut brush, also known as an angled sash brush, is an indispensable tool in the painter’s brush arsenal. This unique brush is thoughtfully designed with its bristles cut at a precise angle, allowing for exceptional versatility and precision in various painting tasks.
One of the key advantages of an angle cut brush is its ability to effortlessly create straight lines and reach into tight corners. Whether you’re painting intricate trim or cutting in at the ceiling, this brush’s angled bristles provide the perfect balance of control and accuracy. It seamlessly adapts to different paint types, but truly excels when paired with latex paints, delivering a flawlessly smooth finish with virtually no visible brush strokes.
In addition to its expertise in creating sharp lines and flawless finishes, the angled edges of this brush make it an ideal companion for painting window frames, door frames, and other narrow, hard-to-reach areas. Its precision and finesse allow for meticulous painting in even the most challenging spaces, ensuring professional-grade results for any DIY painting project.

With an angle cut brush in hand, any detail-oriented painter can elevate their craft and achieve exceptional outcomes, adding a touch of artistry and finesse to their work.
Sash brush
The sash brush is a highly specialized tool in the realm of painting. It is meticulously designed specifically for painting window sashes and other fine detail work, ensuring exceptional precision and control.
With its long, slender shape, the sash brush offers artists the ability to effortlessly create straight lines and accurately paint window muntins or other intricate trim with ease.Sash brushes are available in a variety of sizes, catering to different painting needs. The smaller brushes are particularly suitable for executing precise detail work, making them ideal for projects that require intricate brushwork. While sash brushes can be used with any type of paint, they truly excel when paired with oil-based paints and stains. The smooth and detailed application provided by these brushes enhances the quality of the final result.
In the hands of a meticulous painter, the sash brush becomes an invaluable tool for delivering clean and professional-quality results in detailed painting tasks. Its fine craftsmanship and ability to handle intricate work make it an essential companion for artists seeking exceptional attention to detail in their creations.
Masonry brush
A masonry brush is an essential tool in the painting world, specifically designed for achieving flawless results on rough surfaces such as brick, stucco, and other masonry structures. These brushes are characterized by their stiff, durable bristles, typically made from synthetic materials to withstand the rigors of painting on such challenging surfaces. With their specially designed shape and construction, masonry brushes are built to hold a large amount of paint, allowing for efficient coverage of uneven textures with fewer strokes.
Not only are masonry brushes perfect for working on rough surfaces, but they also excel in handling thick, heavy paints commonly used for outdoor applications. Whether you’re dealing with heavily textured coatings or paints that contain grit to create a unique ‘pebbled’ finish, a masonry brush is up to the task. The robust bristles provide excellent control and precision, ensuring a smooth application and professional-looking results.

Whether you’re embarking on a DIY home improvement project or tackling a professional painting task, having a masonry brush in your arsenal is a game-changer when working with masonry surfaces. Its exceptional paint-holding capacity, durability, and versatility make it a dependable tool that will help you achieve remarkable finishes every time.
Dogleg brush
The Dogleg brush is a highly specialized tool that every painter should have in their kit. With its unique cranked handle design, resembling a dog’s leg, it is specifically engineered to tackle those hard-to-reach areas and awkward angles that other brushes struggle with. This unconventional structure allows the brush to effortlessly maneuver behind radiators, into tight corners, and under appliances or fixtures, ensuring no spot is left untouched.
Not only does the Dogleg brush excel in its form, but it also delivers in its function. The brush is typically equipped with high-quality synthetic bristles, making it suitable for use with all types of paint, whether it be water-based or oil-based products. This versatility ensures that you can achieve exceptional results regardless of the medium you are working with.
What sets the Dogleg brush apart is not just its design and bristle quality but also its compact size and slim profile. These features contribute to its precision, enabling you to execute neat and flawless work even in the narrowest of spaces. Whether you’re painting intricate trims, detailed moldings, or delicate edges, the Dogleg brush will prove to be your go-to tool for those tasks where standard brushes fall short.
In summary, the Dogleg brush is more than just a niche tool; it is an indispensable asset for any painter who values precision and efficiency. Its ability to effortlessly navigate tricky areas and deliver exceptional results sets it apart from conventional brushes, making it an essential addition to any painter’s arsenal.[2]
How to avoid brush marks?
Dip it in water
Another practical tip for achieving a smooth, professional paint finish is to dip your brush in water before painting. This method is particularly effective when using water-based or latex paints.
By dipping the brush in water, you help keep the bristles soft and flexible, creating the perfect conditions for a smoother application of paint onto the surface. It also helps minimize the chances of paint clumping on the bristles, ensuring a more even distribution of paint.
Moreover, when you dip your brush in water, it reduces friction during the painting process. This reduction in friction makes it easier to achieve long, even strokes, resulting in a more seamless and professional-looking finish.

Remember to shake off any excess water before dipping the brush into the paint. This way, you’re not diluting the paint, but priming the brush for a smoother application.
By utilizing this simple yet effective technique, you’ll find that your painting tasks become significantly easier, and the results will be of professional-level quality. So go ahead, try it out, and elevate your painting skills to new heights!
Lightly sand between coats of paint
An essential step to achieving a smooth, flawless finish with your paint job is to lightly sand between the coats of paint. This method works wonders in eliminating paint ridges and brush marks that may have been left from the previous coat, ensuring a professional-grade result.
To begin, allow the first coat of paint to fully dry, giving it ample time to settle. Once the paint is dry, take a piece of fine-grit sandpaper and gently sand the surface, paying attention to any uneven areas. The aim here is not to remove the paint entirely, but rather to buff away any imperfections and create a smooth base for the next coat.
After sanding, it’s important to remove the resulting dust from the surface. You can do this by using a damp cloth or a tack cloth, ensuring that the surface is clean and free from any dust particles. This step is crucial as it helps to maintain a pristine surface for the next coat of paint.
Now that you have taken the necessary steps to prepare the surface, you’re ready to apply the next coat of paint. Repeat this sanding process between each coat for the best results. While it may seem a bit time-consuming, the resulting smooth finish will be well worth the effort and give your project a professional touch.
Remember, taking the extra time to sand between coats not only enhances the visual appeal of your paint job but also ensures a flawless and long-lasting finish.[2]
When to use a paint roller?
A paint roller is the go-to tool for most interior and exterior painting projects due to its efficiency in covering large, flat surfaces. It is a cylindrical tool with a handle and a rotating roller covered in a material called nap. The nap absorbs the paint and evenly distributes it onto the surface being painted.
When working on walls, ceilings, or broad areas of furniture, a paint roller can save significant time and effort compared to a regular brush. By simply rolling the paint onto the surface, you can cover a large area in a short amount of time. This makes it an ideal choice for painting projects that require speed and efficiency.
Not only does a paint roller save time, but it also provides a smoother finish compared to a brush. The rolling action of the roller helps to eliminate visible brush strokes, resulting in a more even and professional-looking paint job. This is particularly important when using latex or oil-based wall paints, as these types of paint can be more prone to leaving brush marks.
It’s worth noting that paint rollers come in different nap sizes to cater to different surfaces. For smooth surfaces like plastered walls, a smaller nap size (around 1/4 to 1/2 inch) is recommended. This allows the roller to make better contact with the surface and achieve a smoother finish. On the other hand, for rough or textured surfaces, a larger nap size (around 3/4 to 1 inch or more) is more suitable. The longer nap can reach into the crevices and texture of the surface, ensuring better coverage.
When painting trim, molding, window frames, or intricate patterns, a suitable brush would be a better choice. Brushes offer more control and precision, allowing you to carefully paint those hard-to-reach areas without accidentally painting adjacent surfaces.In conclusion, a paint roller is an indispensable tool for most painting projects. Its efficiency, ability to cover large areas quickly, and ability to provide a smooth finish make it a favorite among both professionals and DIY enthusiasts. Just remember to choose the right nap size for the surface you are painting, and switch to a brush when precision is needed. Happy painting![3]
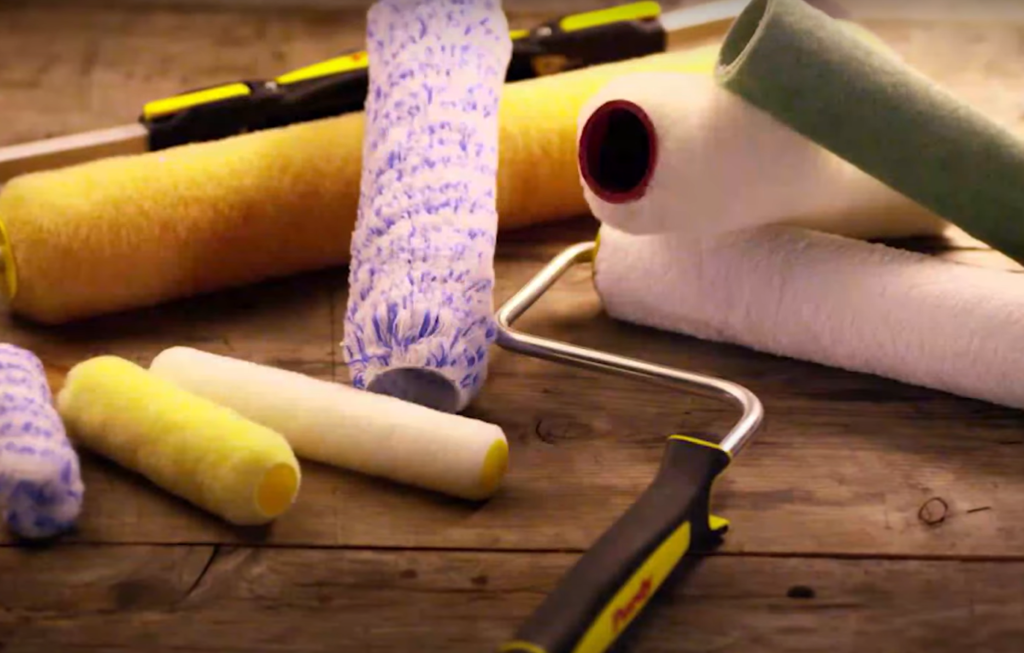
Types of paint roller sleeves
There are various types of paint roller sleeves, each designed for a specific application or surface condition. The differences lie primarily in the material of the sleeve and the length of the nap.
- Synthetic Roller Sleeves: These are made from nylon or polyester, or a combination of the two. Synthetic roller sleeves are durable and versatile, suitable for all types of paint and surface conditions.
- Sheepskin Roller Sleeves: Known for their exceptional paint-holding capacity, sheepskin roller sleeves allow for a quick application and are ideal for large areas. They work best with oil-based paints, varnishes, and enamels.
- Foam Roller Sleeves: Foam roller sleeves provide a smooth finish, making them perfect for glossy paints and varnishes. However, they are not suitable for rough surfaces as they can easily tear.
- Microfiber Roller Sleeves: These sleeves offer a smooth finish and high paint capacity. They are suitable for both water and oil-based paints and can be used on smooth to semi-rough surfaces.
The nap or pile of the roller sleeve can vary in length. Short-nap rollers (1/4 to 1/2 inch) are ideal for smooth surfaces like plaster, wood or metal. Medium-nap rollers (3/8 to 3/4 inch) are best for semi-rough surfaces like textured plaster or concrete. Long-nap rollers (3/4 to 1 1/2 inch) are designed for rough surfaces like stucco or brick. By selecting the appropriate roller sleeve for your project, you can enhance the efficiency of your work and the quality of the result.[3]
Sleeve thickness
The thickness of the roller sleeve, also known as the nap, plays a significant role in the efficacy of paint application. The nap refers to the length of the fibers that extend from the roller, and it directly impacts the texture of the paint job.
In contrast, a thinner nap (1/4 to 1/2 inch) is more suitable for smooth surfaces like plaster, wood, or metal because it delivers a smooth finish with less texture. On semi-rough surfaces like textured drywall or concrete, a medium-thick nap (3/8 to 3/4 inch) is often the best choice. It’s essential to choose the appropriate nap size for your project to ensure a high-quality finish.
Remember, a mismatch between the nap size and the surface texture can lead to an uneven application or an unsatisfactory finish, undermining the appearance and longevity of your paint job.[3]
FAQ
Are paint rollers better than brushes?
Paint rollers are often preferred for covering large, flat surfaces quickly and efficiently. They hold more paint than brushes and distribute it evenly, reducing the chance of streaks or lines. Rollers can also reach into textures, ensuring a uniform coat of paint. However, for detailed work or sharp edges, a brush provides better control. It’s not about one tool being better than the other, but choosing the right tool for the job.
Do professional painters use a brush or roller?
Professional painters use brushes and rollers based on the requirements of the job. Rollers are ideal for large, flat surfaces and textured areas, ensuring quick and thorough coverage. For precision tasks like trims and intricate areas, brushes are preferred. Professionals strategically utilize both tools to achieve the best finish.
Do professional painters use rollers?
Professional painters use rollers for their painting jobs. Rollers are ideal for painting large, even surfaces, allowing for swift and efficient paint application. They can penetrate textures, ensuring complete coverage. Rollers are indispensable for painting textured surfaces or walls and for applying primer or fresh coats over large areas. However, for precision tasks like painting edges, trims, or intricate details, brushes are typically preferred. Professionals often use rollers in combination with brushes to achieve the best results.
Is brush or roller better for a smooth finish?
To achieve a smooth finish, the choice between a brush and a roller is crucial. Rollers evenly distribute paint on large, flat surfaces, eliminating visible brush strokes. Opt for a roller with a small nap for the smoothest finish. However, for smaller, detailed areas, a high-quality brush offers more control and precise application. Remember, achieving a smooth finish depends not only on the tool but also on technique, paint type and quality, and surface preparation.
What are the disadvantages of a paint roller?
While paint rollers have advantages, they also have drawbacks. Firstly, rollers can be messier than brushes, splattering paint when rolled too fast or overloaded. This can lead to a messier work area and require extra cleanup time. Secondly, rollers excel on large, flat surfaces but struggle with detailed work or tight corners where a brush offers more control. Thirdly, rollers can be more expensive, requiring replacement covers for different paints. Lastly, rollers require more prep work, like covering furniture and flooring to protect from splatter. Despite these drawbacks, rollers are often beneficial for larger surfaces or when speed and efficiency are important.
Do paint rollers make a difference?
Paint rollers can significantly improve the painting process and outcome. They offer efficient and uniform application, especially on large and textured surfaces, resulting in a professional-looking finish without brush strokes. Rollers also ensure better paint absorption into the wall’s texture, providing thorough coverage compared to brushes. However, it’s important to consider that rollers may splatter paint and are not suitable for detailed work. Evaluate the specifics of the job to determine if a roller is the right tool.
Useful Video: Paint Roller vs Paint Brush – Which One Should You Get?
Conclusion
In conclusion, choosing between a paintbrush and a roller depends on the specific needs of the project. Rollers are efficient for large, flat, or textured surfaces, providing a smooth finish without brush strokes. Paintbrushes offer control for detailed work, such as trims and corners. Professional painters use both tools to achieve the desired finish. Remember, technique, paint quality, and surface preparation also affect the outcome of your paint job.
References:
- https://homeoneservices.com/roller-vs-brush/
- https://www.kentblaxill.co.uk/blog-news-how-to-guides/post/when-to-use-paint-rollers-vs-paint-brushes
- https://www.nixsensor.com/blog/when-to-use-a-paint-roller-vs-paint-brush/